Preventing messages and communication from being intercepted between two machines is a requirement in today’s IT infrastructure. In order to secure your communications between a server and client, encryption is required. TLS is the current standard. This walk-through will help install and configure SSL/TLS certificates on a Cent OS 7 machine. Check out the CentOS 7 Installation walk-through before starting if you want a guide on the installing Cent OS.
1. Install module mod_ssl. sudo yum install mod_ssl
![]()
2. Create directory to store certificates. sudo mkdir /etc/ssl/secret
![]()
3. Only the root user needs permission to this directory so we will change the permissions. sudo chmod 700 /etc/ssl/secret
![]()
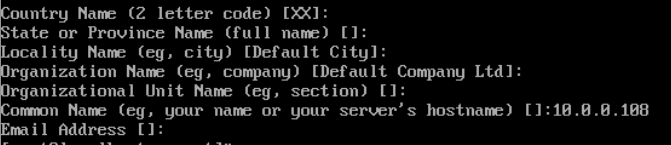
4. Create key files. sudo openssl req -x509 -nodes -days 365 -newkey rsa:4096 -keyout /etc/ssl/secret/selfsigned.key -out /etc/ssl/certs/selfsigned.crt
![]()
5. I am using my certificates within my local network so I usually leave these options blank (Common Name = IP address or domain name)
6. sudo openssl dhparam -out /etc/ssl/certs/dhparam.pem 4096 (Generating a 4096 bit key will take some time)
![]()
7. Append the key to the self-signed certificate. sudo cat /etc/ssl/certs/dhparam.pem | sudo tee -a /etc/ssl/certs/selfsigned.crt
![]()
8. Edit ssl.conf file. sudo vi /etc/httpd/conf.d/ssl.conf
![]()
9. Search the document with /DocumentRoot, then change the lines to:
DocumentRoot “/var/www/html/Your-Domain.com/public_html”
ServerName www.Your-Domain.com:443
![]()
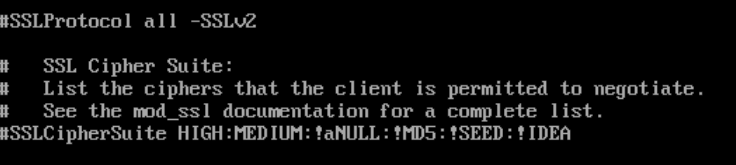
10. Next, Search for /SSLProtocol and comment out the following lines:
#SSLProtocol all -SSLv2
#SSLCipherSuite HIGH:MEDIUM:!aNULL:!MD5:!SEED:!IDEA
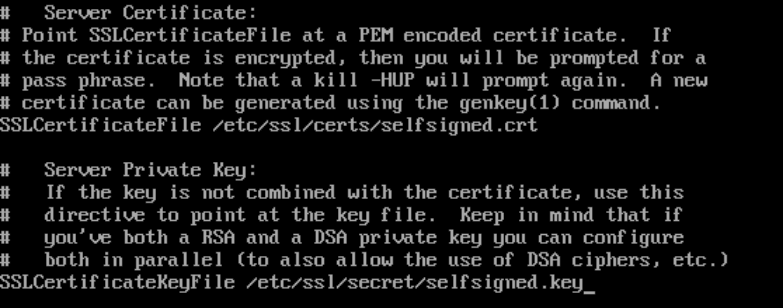
11. Last, Search for the /SSLCertificateFile and change the directory to the name created earlier in steps 2 and 4:
SSLCertificateFile /etc/ssl/certs/selfsigned.crt
SSLCertificateKeyFile /etc/ssl/secret/selfsigned.key
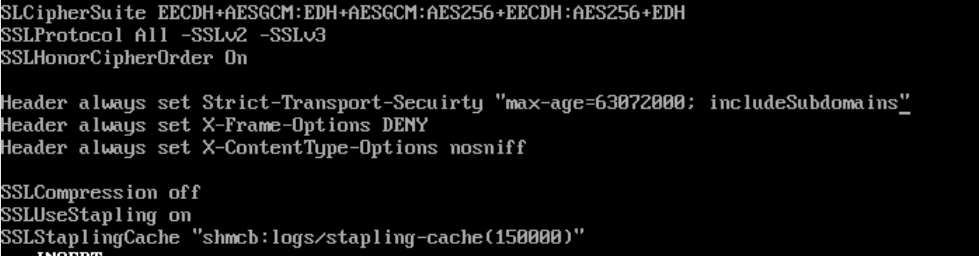
12. Scroll down in the config file and look for </VirtualHost> Enter the following lines of configuration:
SSLCipherSuite EECDH+AESGCM:EDH+AESGCM:AES256+EECDH:AES256+EDH
SSLProtocol All -SSLv2 -SSLv3
SSLHonorCipherOrder On
Header always set Strict-Transport-Security “max-age=63072000; includeSubdomains”
Header always set X-Frame-Options DENY
Header always set X-Content-Type-Options nosniff
SSLCompression off
SSLUseStapling on
SSLStaplingCache “shmcb:logs/stapling-cache(150000)”
13. We want to server only secure pages over port 443. To force that action we will create the following config file:
sudo vi /etc/httpd/conf.d/forcessl.conf
<VirtualHost *:80>
ServerName www.Your-Domain.com
Redirect “/” “https://www.Your-Domain.com/”
</VirtualHost>

14. Now open the correct ports in the firewall using the following commands:
sudo firewall-cmd –add-service=https
sudo firewall-cmd –runtime-to-permanent

15. Now visit the https://www.Your-Domain.com
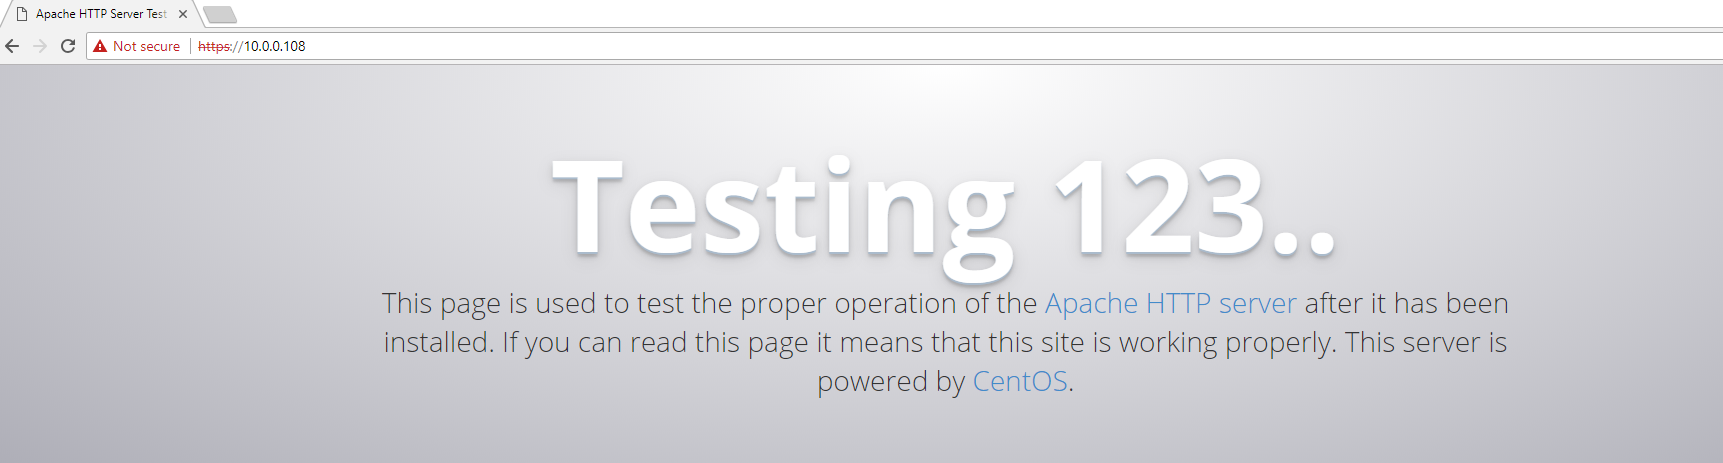
Success! Check back for more projects using certificates in the future of TrenchesofIT.com