After building out a fairly transparent home network, I found myself needing to receive IDS and SIEM alerts so I could respond to events quicker. AWS is reliable and fairly cheap, so that is the platform I chose to build out my SMTP server. This guide will only show how to stand up a system with the ability to forward emails received from sources. The project can then be expanded by looking into webmail services such as Roundcube, Zimbra, SquirrelMail, Rainloop, etc.
Create an AWS account.
EC2 Dashboard > Running Instances > Launch Instance
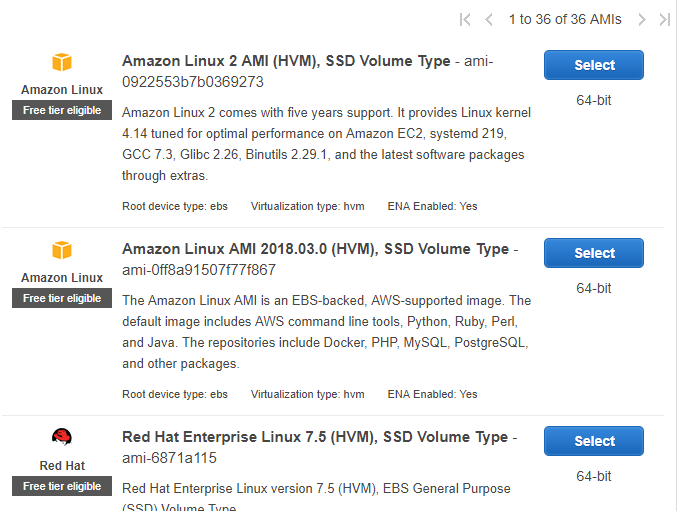
I will be going with a General purpose t2.micro due to low usage.

Next: Configure Instance Details
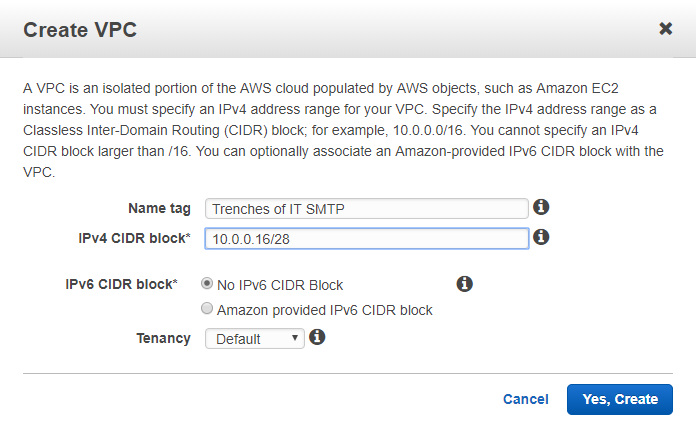
Create new VPC > Create VPC
Here I will be creating the smallest range of usable IP Addresses for good practice. (/28 allows 14 usable IP’s)
Now back on the Configure Instance Details page, choose the dropdown next to network and choose the newly created VPC

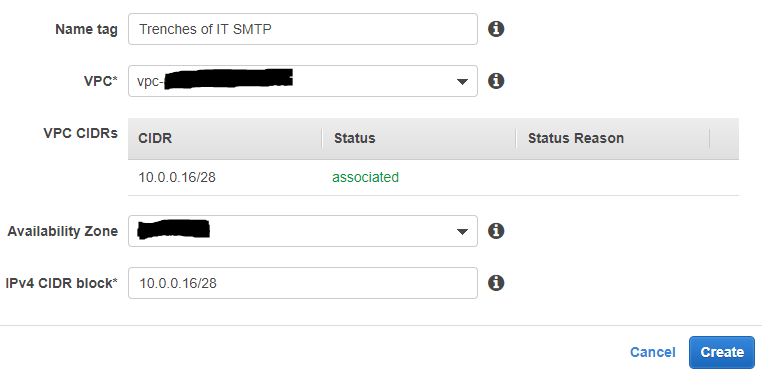
Create new subnet > Create subnet
Enter the tag to help identify the subnet. Dropdown VPC and select the VPC created above. Select an availability zone.
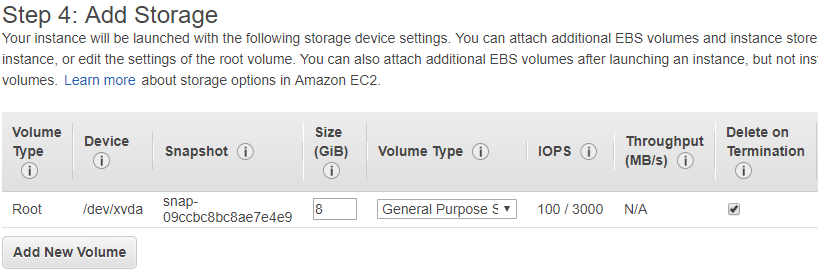
Next: Add Storage
Leave default settings here.
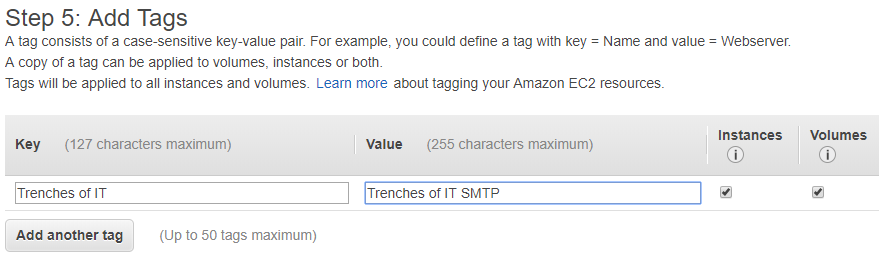
Next: Add Tags
Next: Configure Security Group
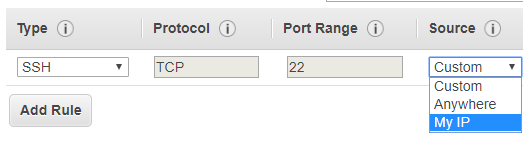
Ensure the Create a new security group radio button is pressed and change the Source to My IP. We will come back to the security groups for additional configuration.
Review Instance and Launch > Launch
Create new key pair > Download Key Pair
![]()
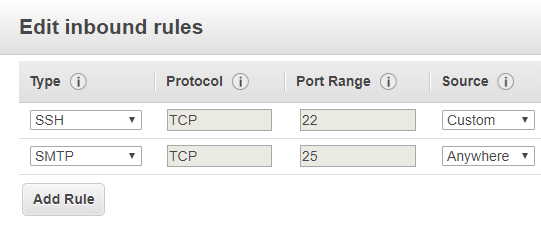
Now lets take a look at the Security Groups again. Select your new Instance and under Network & Security on the left side chose Security Groups. Select the new Security Group > Actions > Edit inbound rules.
Create rule for incoming SMTP TCP traffic over port 25 from anywhere.
We need to give our new VPC an internet gateway. Services > VPC > Internet Gateway. Create internet gateway > Enter tag for management > Create.
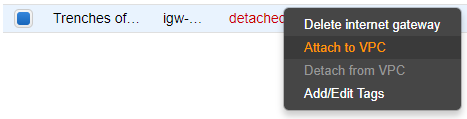
Right Click > Attach to VPC > Drop down to new VPC > Attach
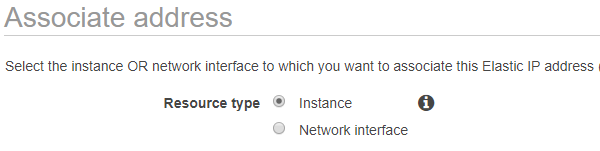
Now lets associate a public IP with the instance. In the EC2 Dashboard, under Network & Security, Click Elastic IPs. Allocate new address > Allocate
Click the new Elastic IP > Actions > Associate Address. Here you will select the Resource type (Instance), Instance, and private IP. Click Associate.
DNS Setup
Services > Route 53
If you do not already own a domain, you can check if it is available here and purchase.

Click hosted zones > Select your domain
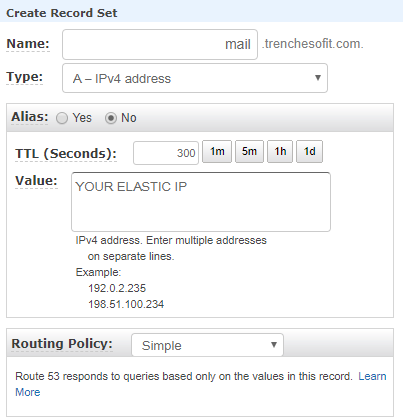
Here we will want to create an A record. Create Record Set. Name: mail, Value: Your_Elastic_IP > Create
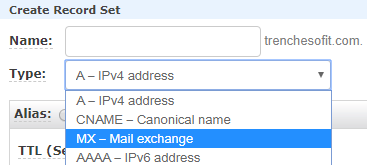
Now for the MX record. Create Record Set. Name: Blank, Value: 10 mail.yourdomain.com > Create
I will be connecting to the server via SSH using putty in Windows. We need to convert the .pem to a .ppk for putty.
Load in the new .pem file downloaded from AWS.
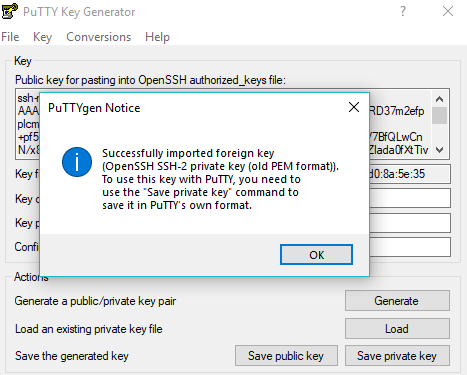
Save private key > Yes > Choose location to save new .ppk
Now lets add the .ppk to putty session. Open putty > + SSH > Auth > Browse
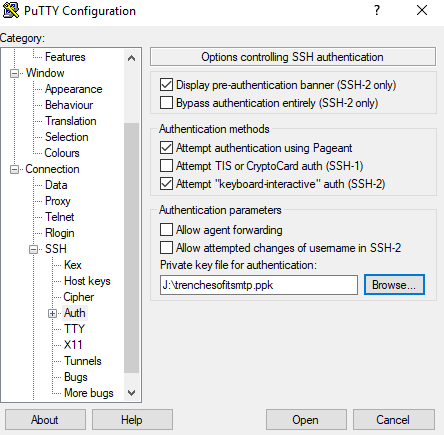
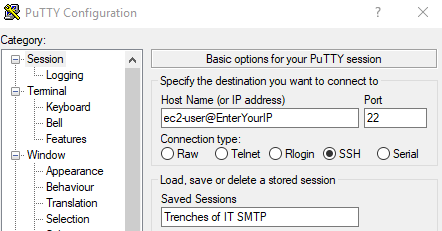
Click back on session within putty and enter ec2-user@ELASTICIP. Name your session and click save. Open
![]()
Configure email server
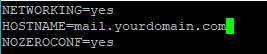
Lets specify the identity of the machine by sudo vi /etc/hosts and adding mail.yourdomain.com on the line with loopback address.

Then sudo vi /etc/sysconfig/network and replace localhost.localdomain with mail.yourdomain.com
Now we will set up the Mail Transfer Agent(MTA). I will be using postfix for simplicity and secure operation mechanisms.
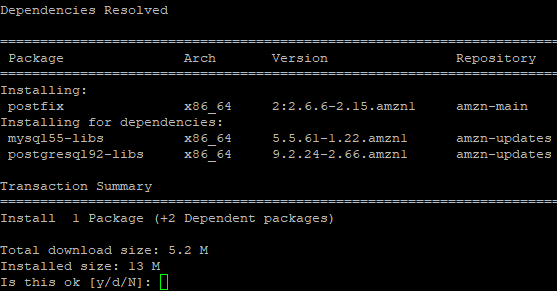
sudo yum install postfix
sudo vi /etc/postfix/main.cf ( To search in vi use /wordyourlookingfor)
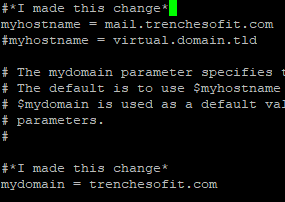
Uncomment the following lines and add your domain:
myhostname
mydomain = yourdomainname.com
mynetworks_style = host
Ensure that postfix is set to start on boot and restart the service
sudo chkconfig –add postfix
sudo service postfix restart
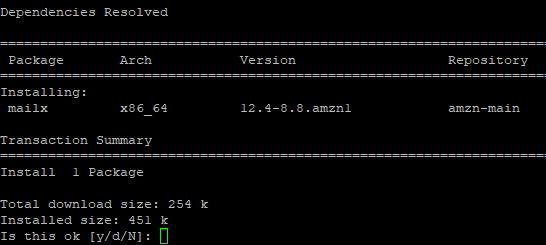
Now we are ready for a mail processing system. I will be using mailx. sudo yum install mailx
Now lets test our configuration.
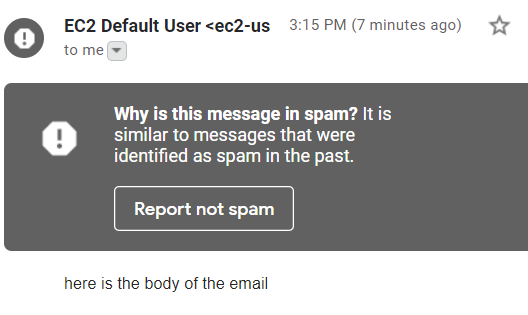
mail different@emailaddress.com
You will then be prompted for the subject and body. When finished with the body type . and press enter
Note: The email will most likely be delivered to your spam folder due to reputation or lack thereof.
When sending mail directly from SMTP server you can clean up the EC2 Default User: sudo vi /etc/mail.rc
Add the following lines to the config file:
set smtp=smtp://localhost
set from=”support@yourdomain.com(Friendly Name)

mailx -v -s “Subject” Email@SendingTo.com

That’s it. This is a great start to working on some future projects. I will also be checking out AWS SES SMTP options. Check back with more progression using this project!
Stay safe in the Trenches of IT!